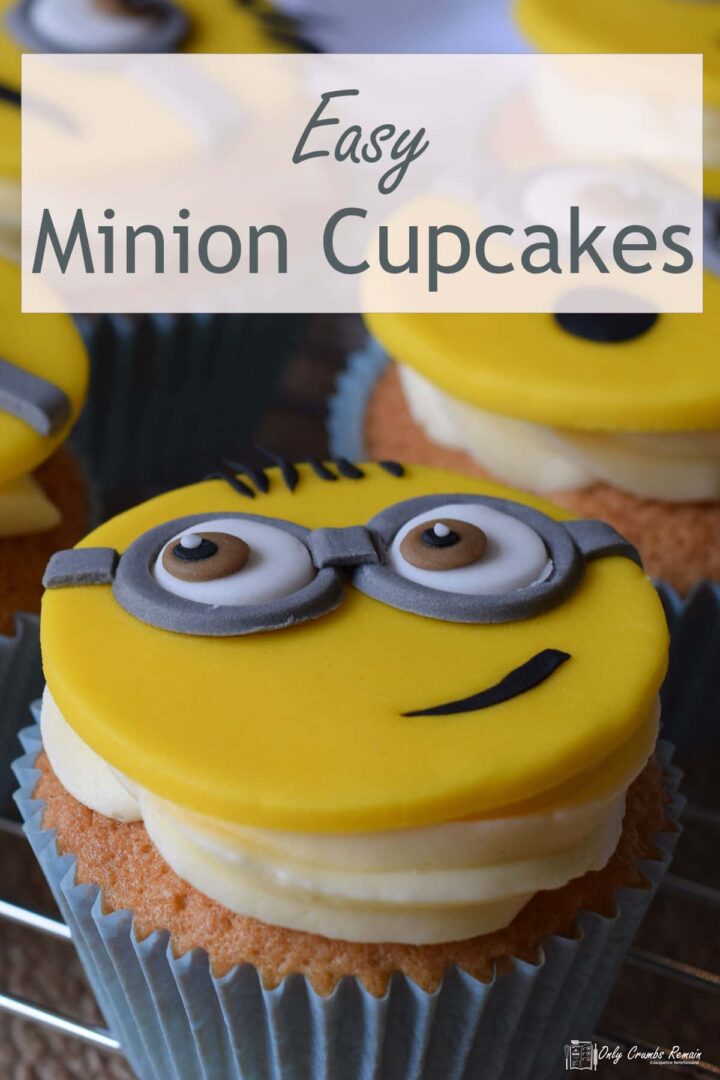
Let your imagination go wild when making these fun Minion themed cupcakes! They're easy to make and are perfect for a child's party or for the bigs kids amongst us.

Fun and easy to make cake toppers
Do not be put off by the long list of steps in the recipe, these Minion Cupcakes are surprisingly easy to make, and yet they are very much recognisable as the mischievous yellow minions!
Check out the video to see just how easy they are to make.
There's no tricky shaping and moulding, nor do you need to use food colouring to colour your fondant as ready coloured fondant is perfect for this fun bake.
Top Tips
- Rather than buying grey fondant, consider kneading together white fondant with a small amount of black.
- Likewise, for the brown fondant add a small amount of yellow and black to a larger piece of red. Knead together well until no longer streaky.
- Aim to keep your hands and utensils as clean as possible when working with different colours of fondant. Black, especially, can soon discolour other fondants.
The fondant is cut into circles with cutters of varying sizes to create the face, glasses and eye detail of these minion cake topper characters!
If you don’t have a large cookie cutter or fondant tools, improvise. Consider using a glass tumbler in place of the cookie cutter. A small toothpick can be useful too when working with fondant.
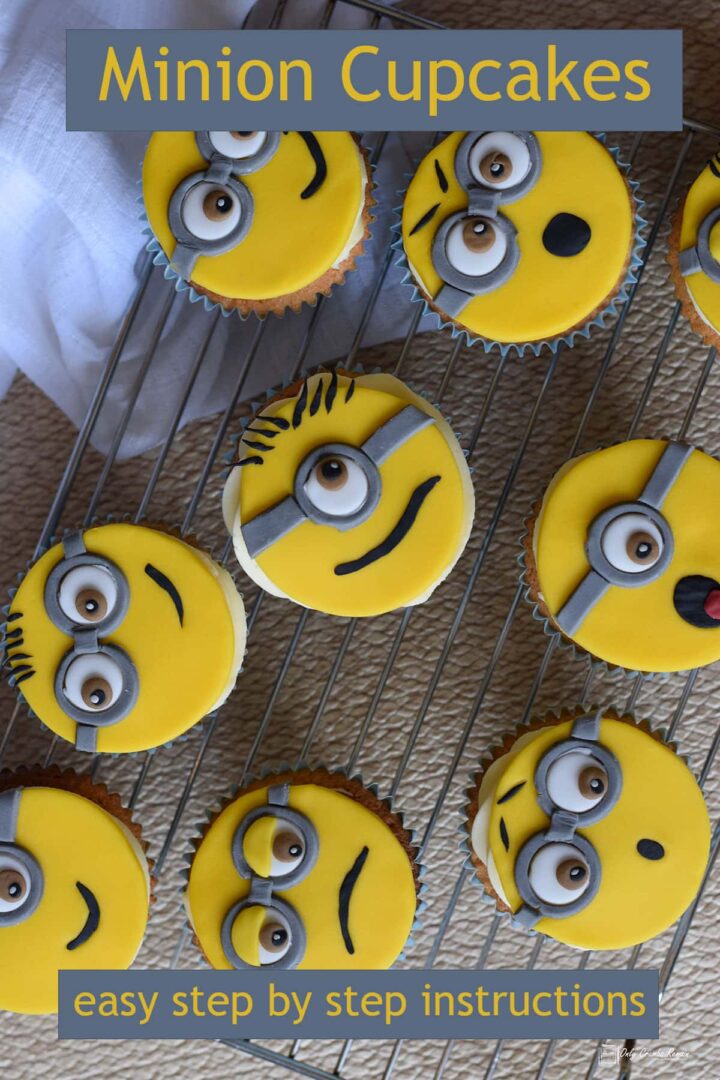
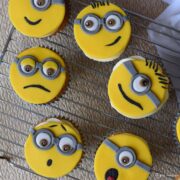
And they certainly are characters. There's the one with the cheeky smile, the one poking his tongue out (tut-tut!), as well as the surprised Minion!
Not to mention the bald one, the one with spiky hair and the one sporting a comb over! These homemade minion cake toppers are easy to make and are only limited to your own imagination!
Minion cupcakes are such a fun bake and these mischievous characters will appeal to young and old alike. Not only would they be great for a child's party, a charity bake sale, or a themed film night but they're also great for letting your imagination go wild.

Ideally make the cupcake toppers about 24 hours before required and leave to dry. Moving the toppers before they have had a chance to dry will cause them to become mishappen .
Position each fondant disc on a square of baking parchment, this will make it easier to move them before they have dried.
The cupcakes
I've used a vanilla cupcake and vanilla buttercream frosting.
And of course, because fondant is unflavoured it means that you can use your favourite cupcake recipe to support your fondant topper!
So you could easily use chocolate cupcakes, lemon cupcakes, fruit cupcakes, the choice is yours.
Why not hollow out the cupcakes a little to provide a secret filling of jam or even chocolate ganache before decorating with buttercream and the fondant disc.
How long will the fondant cupcake toppers keep?
The cake toppers will keep for at least one month if stored in an airtight container in a cool place. If completely dry you can stack them in the container separating each layer with baking parchment.
How Long will the cupcakes keep?
Once assembled the cakes can be store in an airtight container in a cool place for up to 5 days.
Minion Cupcakes
Equipment
- muffin tin
- muffin cake cases
- piping bag
- star nozzle
- Rolling Pin
- round cutters
- fondant tools (optional) or toothpick
- small paint brush (used for food use only)
- baking parchment
Ingredients
For the Vanilla Cupcakes
- 225 g (8oz) butter softened
- 225 g (8oz) golden caster sugar
- 1 teaspoon vanilla extract
- 4 medium eggs beaten
- 225 g (8oz) self-raising flour
- 1-2 tablespoon milk
For the Vanilla Buttercream Frosting
- 175 g (6oz) butter softened
- 350 g (12oz) icing sugar
- ½ teaspoon vanilla extract
- splash of milk
For the Fondant Minion Cupcake Toppers
- 250 g (9oz) yellow fondant
- small amounts of black, grey, white, brown fondant
- cornflour for dusting
Instructions
To Make the cupcake toppers
- Knead 250g (9oz) yellow fondant until soft and pliable. Dust the work surface with a little cornflour if necessary and roll out. Use a 7cm (2¾in) round cookie cutter to cut 12 discs. Position each fondant disc on a square of baking parchment, this will prevent the fondant from becoming mishapen if you need to move them. Set aside to dry.
- To make the Minions’ glasses. Prepare some grey fondant and knead until soft and pliable. Roll out the grey fondant. With the wide end of a large piping nozzle (or small cutter) cut out between 12-24 discs. (Remember some minions only have one eye!).
- Next, with a smaller piping nozzle remove the centre from each grey disc which will therefore leave you with a ring of grey fondant. Repeat with the remaining discs. Ball up and cover the small cut away discs for later.
- Knead some white fondant. Roll out onto a work surface dusted with cornflour. Using the same small piping nozzle as you used tocut out the inner circle of the glasses frame cut out some white discs. These will be the whites of Minions’ eye. Roll out some brown fondant and cut out smaller discs with the narrow end of a plain round piping nozzle for the irisies.
- Begin to assemble the Minions’ glasses and eyes. Using a small paint brush (reserved for food use only), paint a small amount of water on the reverse of a grey fondant ring. Position the disc on one of the yellow circles, either centrally for a one eyed Minion or slightly off to the side for a two eyed Minion. Gently press the grey ring to stick in position. Continue positioning the grey glasses frame to the Minion’s yellow face.
- Paint a tiny bit of water inside of the grey ring. Position a white disc in the centre – it should fit snugly. Again apply a small amount of pressure with your finger tip to affix it.
- Apply a small amount of water to one of the brown discs. Position this on the white of the Minion’s eye (applying a small amount of pressure to afix it), considering the expression you want it to have. Repeat with the remaining brown discs.
- Create the pupils with a small amount of black fondant rolled into a ball. Paint a tiny amount of water onto the brown fondant. Position the black ‘pupil’ and use the pad of your thumb or index finger to gently flatten the black. Repeat with the remaining eyes.
- Finish the glasses. Roll out the remaining grey fondant on a work surface lightly dusted with cornflour. Use a non-serrated knife to cut strips of the grey to be used as the ‘arms’ of the glasses. Affix the arms of the glasses to the Minion’s face with a small amount of water.
- Apply hair to the Minion. Decide if your Minion will be bald or have hair – and its style. Using black fondant roll very thin short ‘sausages’. Afix to the yellow disc with a small amount of water in the style you want.
- Use a fondant tool or tooth pick to create a line for the Minion’s mouth (and eye brows as appropriate). Give your Minions expressions. Try to avoid dragging the yellow fondant. Using a small amount of black fondant roll it into a sausage shape. Apply a small amount of water to the shape of the mouth. Carefully allow the black fondant to lay into the shape of the mouth. Apply gently pressure with a flat tool to afix. If creating a round mouth for a yawn or a shocked expression shape a small amount of the black fondant into a disc and affix with water.
- Finish the Minions’ eyes. Shape a tiny piece of white fondant into a ball. Apply a little water to the black pupil and afix the white. This helps to bring a bit more ‘life’ to your Minion. Set the faces aside to dry overnight.
To make the cupcakes
- Preheat the oven to 190℃/ (170℃ fan/ 375℉ / Gas 5. Line the muffin tin with cases.
- Beat 225g (8oz) butter and 225g (8oz) sugar together until very pale and fluffy. Add 1 teaspoon vanilla extract and beat to combine. Gradually add the beaten egg a little at a time, beating well after each addition.
- Fold in 225g (8oz) flour with a large metal spoon or spatula, then add 1- 2 tablespoon milk and fold in.
- Divide the cake mixture equally between the 12 cupcake cases. Bake in the centre of the oven for 20 – 25 minutes. Once baked, remove from the oven and muffin tray and place onto a cooling rack to coll completely.
To make the buttercream
- Beat 175g (6oz) butter until soft and creamy. Sieve (350g) 12oz icing sugar to remove any lumps and add about half to the butter. Beat into the softened butter. Add the remaining icing sugar in batches and beat to combine. Add the vanilla extract mix and beat until light and creamy. Add a drizzle of milk as necessary until it is the softness you like. Spoon the mixture into a piping bag fitted with a large star nozzle.
To complete
- Once the cupcakes have completely cooled pipe a flat swirl of frosting on top of each cake. Carefully remove the fondant disc from the greaseproof paper and position it on top of the buttercream. Enjoy!
Video
Notes
- You may need to rotate the tray after 12- 15 minutes of baking for even browning.
- Why not hollow out the cupcakes a little to provide a secret filling of jam or even chocolate ganache before decorating with buttercream and the fondant disc.
- If you don’t have a large cookie cutter or fondant tools, you can improvise. Consider using a glass tumbler in place of the cookie cutter. A small tooth pick can be useful too when working with fondant.
- Rather than buying grey fondant, consider kneading together white fondant with a small amount of black. Likewise, for the brown fondant add a small amount of yellow and black to a larger piece of red. Knead together well until no longer streaky.
- Aim to keep your hands and utensils as clean as possible when working with different colours of fondant. Black, especially, can soon discolour another fondant.
Jaymee
Sounds like an amazing recipe! Just a question about the fondant toppers - as you make them the day before, what container/covering do you use to let them dry overnight?
Many thanks 🤩
Jacqueline Bellefontaine
I leave them uncovered or covered with a clean tea towel in a dry place.
Eb Gargano | Easy Peasy Foodie
These are so cute! My kids would love them 😀
Angela - Only Crumbs Remain
You're welcome, I hope you you enjoy them as much as we have if you get chance to make them. Do let me know how you get on with them 🙂
Angela x
Angela - Only Crumbs Remain
Aw thankyou Kat 🙂
Angela x
Angela - Only Crumbs Remain
Thankyou Kate 🙂
I know, FoodGawker can be confusing can't they. I know iIve submitted some which I thought they'd decline, but I submitted them because you simply never know. And low-and behold they accept them! Thanks for your lovely comment Kate,
Angela x
Angela - Only Crumbs Remain
Aw thankyou so much Jenny, that's so lovely of you 🙂
Angela x
Angela - Only Crumbs Remain
Aw thankyou so much Monika, that's so lovely of you to say 🙂 Though I do hope it's not toooo long. I know I needed to be quite ruthless in cropping out parts and speeding things up a bit too.
Angela x
Angela - Only Crumbs Remain
Aw thankyou Corina, and you're welcome it's such a great linky,
Angela x
Angela - Only Crumbs Remain
You're welcome Deepika, they certainly put a smile on the faces of those we shared them with - kids and adults.
Angela x
Angela - Only Crumbs Remain
Thankyou Lathiya,
Angela x